This year, for my ongoing guitar fascination, I thought I’d try something different. Rather than buying another guitar, I thought I’d try to build one. Now, when I say build, I mean to attempt a guitar kit build—which is one step up from using a virtual guitar builder to design and buy a guitar.
My wife would be the first to tell you that I am not a handyman, so building a guitar as a true luthier would—carving and shaping the guitar body and neck—would not have resulted in anything that resembled a guitar.
A guitar kit build seemed like a safer option.
The guitar kit that I purchased was an Explorer-style shape from the folks at Pit Bull Guitars. I liked them for several reasons. Firstly, they’re Australian which is only important because I’m also Australian and this improved my shipping cost and time. Secondly, their range gave me exactly what I was looking for—an Explorer body shape with no scratchplate on the front of the guitar.
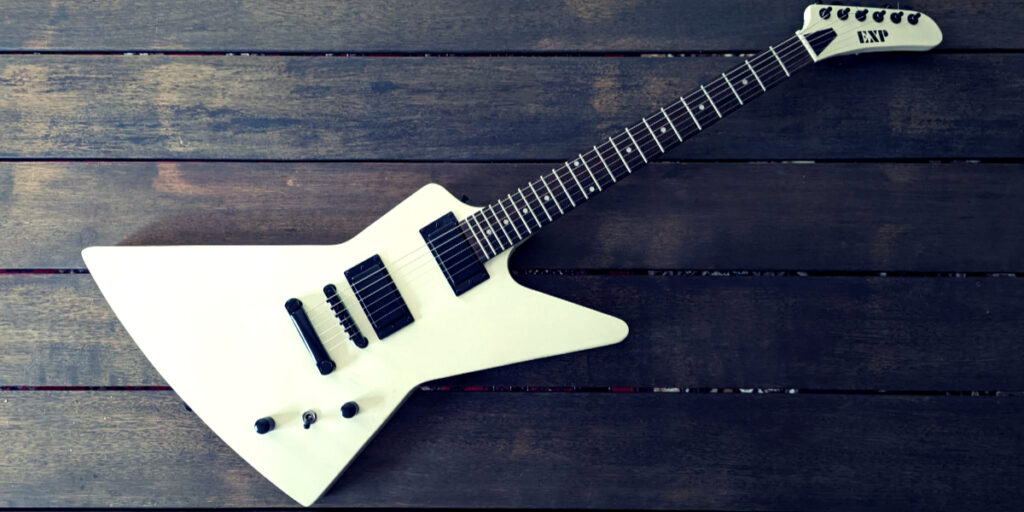
The guitar style I was aiming for was a certain off-white Explorer made famous by the man most responsible for my initial interest in playing guitar—James Hetfield. His ESP model from the late 80s was the first guitar I truly loved.
With the goal set, I made my purchase. When the box arrived, I was skeptical. It felt very light. I wasn’t sure what a guitar kit should feel like as I’d never received a guitar in a square box before. Once I opened it though, my confusion was quickly replaced with excitement. Everything was there and everything looked amazing.
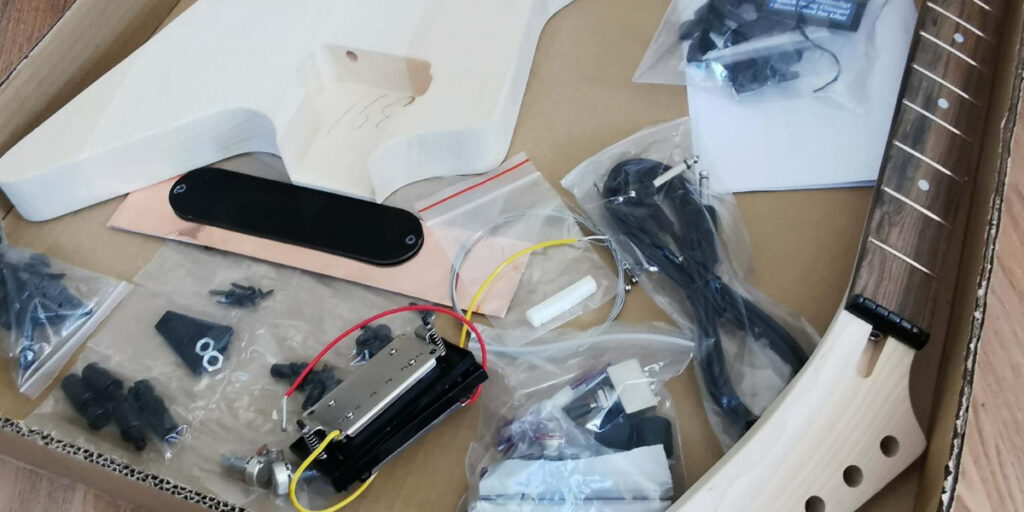
I had made a few upgrades with my guitar kit build. I’d chosen Grover locking tuners, a bone nut, copper for the electronics cavities, and black hardware to replace the default chrome hardware. One pleasant surprise was that because I’d upgraded all of the hardware to black, I received the black tuners as well as the Grover tuners I’d also purchased. So, now I have spares!
As I mentioned earlier, I am not a handyman. This meant that for me to complete this guitar build kit, I needed some tools and equipment that I didn’t already own. After a trip to the local hardware store, I ended up with everything I needed to prepare the guitar for gluing and painting.
Everything except for the skills to use the tools or do the required work.
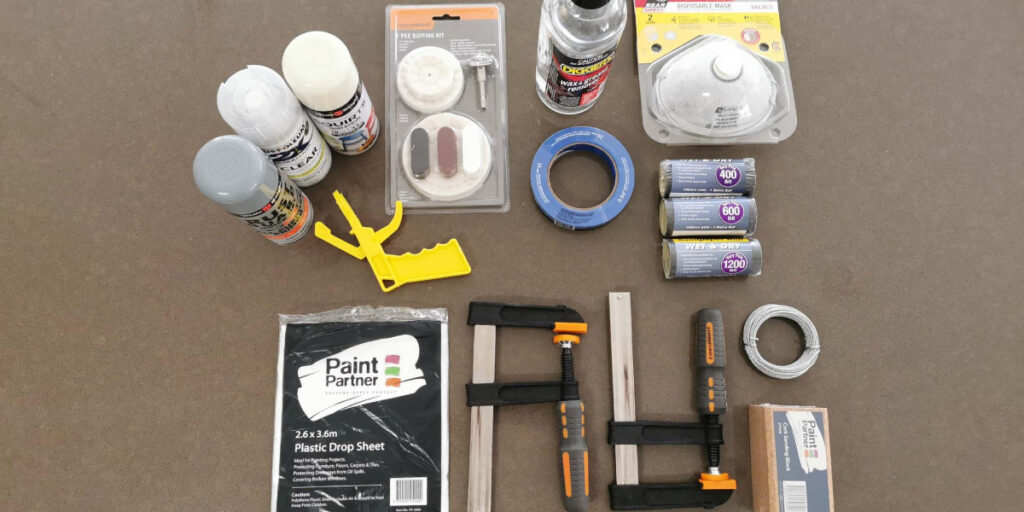
After buying this gear, I also purchased additional sandpaper grades from an auto store as they have finer grades of paper. This was required for the final stages of the painting process that I’ll get to later. For the most part, I had purchased well though. Now I needed to start the actual build process.
Guitar kit build process
According to the Pit Bull Guitars instructions, it’s important to do a mock build first. What this means, is to lay all of your parts out to ensure they are all there. My guitar model has a set neck which required gluing the neck into the body. Before doing this, it’s important to check that the two pieces fit and align nicely. I gave this a go and as far as I could tell, everything was fine.
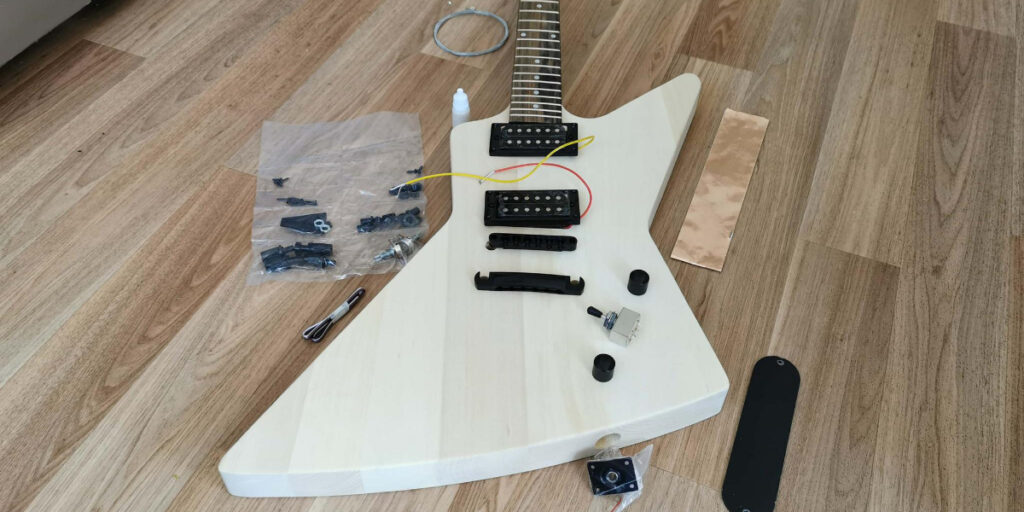
I wasn’t sure how to test the guitar’s string action as the neck needed to be in place for that and I wasn’t confident that a clamp would hold the neck in place under string tension. So, I risked this part and moved onto the neck gluing stage of the guitar kit build. Possibly, my first mistake.
After a small amount of sanding—the neck originally fit into the neck pocket a little too tightly—it was time to apply the provided wood glue to the neck and body. I then applied the two clamps to hold the two pieces in place. I put several pieces of cardboard between the clamps and the guitar as I didn’t want to damage the wood inside the neck pickup cavity or the fretboard. I had purchased clamps with rubber ends, but I wanted to be sure.

I wiped away any excess glue as it came out from the joins under the clamp pressure and waited for the glue to dry and set. I should point out that I believe I could have started the painting process first and glued the neck and body together later, but I was hoping to end up with a paint finish that had no visible joins between neck and body. That was the goal at least.
Once set, I sanded the wood of the guitar in preparation for the painting process. There are instructions on the Pit Bull Guitars forum for this and there is also an instructional video. I probably watched around ten other videos on guitar sanding and I ended up overly confused and conflicted. Still, I ended up sanding the wood to a stage I believed was ready for the paint application.
After sanding, I replaced the plastic nut on the guitar’s neck with the bone upgrade I’d purchased and taped the fretboard and body holes so I could begin the painting process. This would be the first process that would terrify me. More on that shortly.
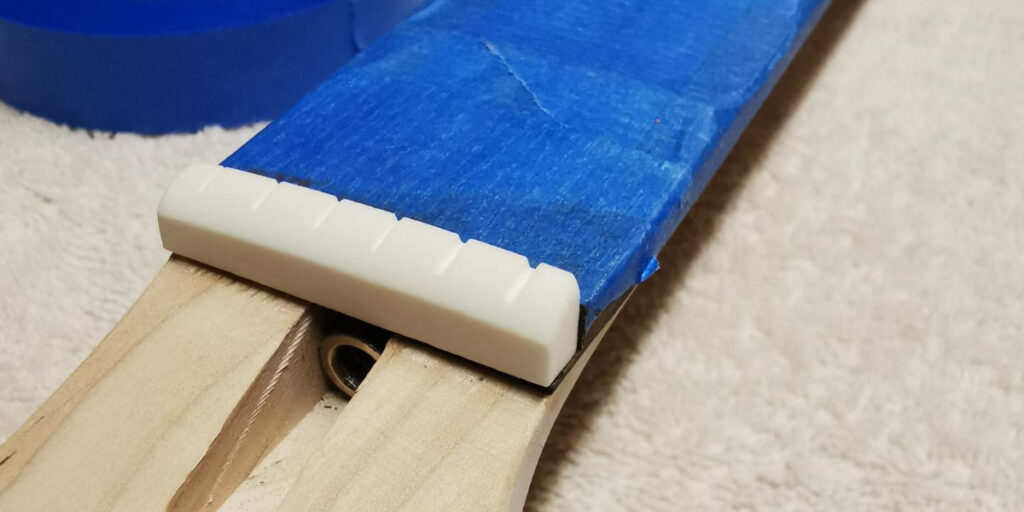
I was certain that I was going to ruin the thin strip of neck wood that the original plastic nut was glued to. I did manage to safely remove it though. The bone nut looked a lot better as well and would tie into the guitar’s eventual colour scheme perfectly.
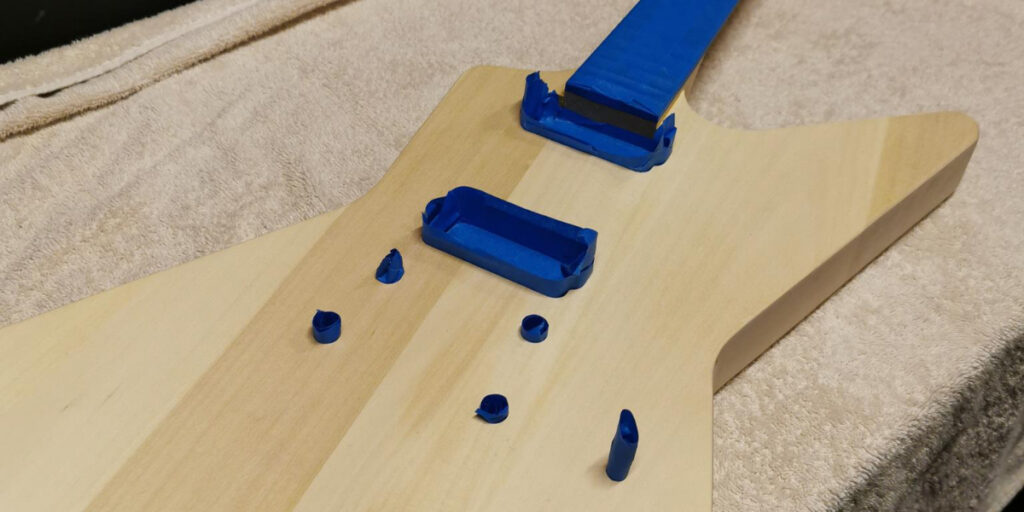
I’d seen instructional videos on preparation for painting that taped all of the hardware holes as I have demonstrated in the image above, and I’d also seen videos where people simply painted everything. My fear was that if I layered paint too thick, that the hardware—especially the bridge and tailpiece—wouldn’t fit.
I believe I chose wisely.
Now, it was time to paint. This stage absolutely terrified me. I have never painted a guitar before and I know that earlier attempts to spray paint other things resulted in drips and streaks. Let’s just say that I’m not a confident painter.
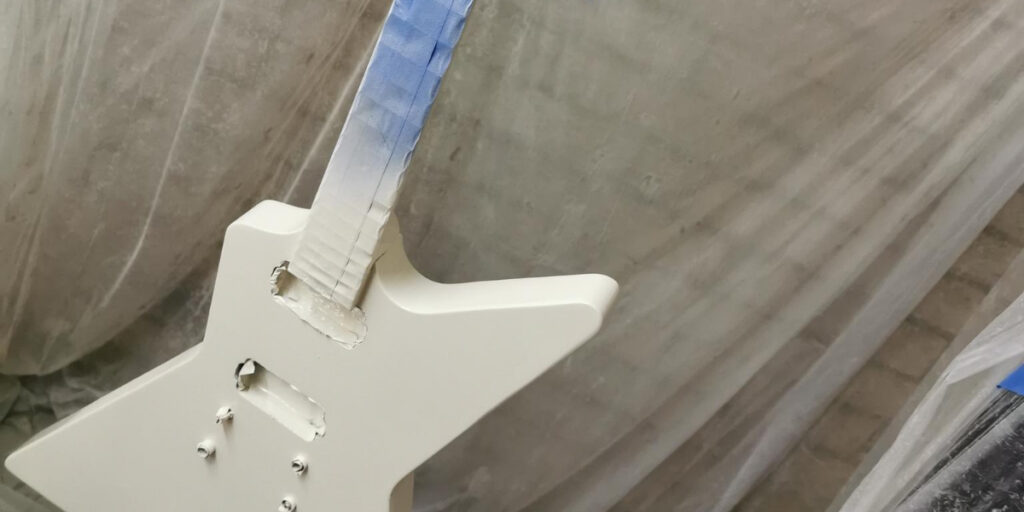
Having said that, I am happy enough with how I ended up painting the guitar. I began with primer/undercoat, moved onto several layers of the paint colour, and eventually layered a clear coat onto the top of that. There were days—if not weeks—between certain stages of the painting process. In retrospect, I should have waited longer as I now have paint issues. I’ll get to that later.
I’d made my own painting setup in my unused garage and did a decent job of trapping the overspray. The trick I ended up using to keep the guitar off the ground while also allowing me to get to every angle of the guitar as I painted it was what I now call the paint pen.
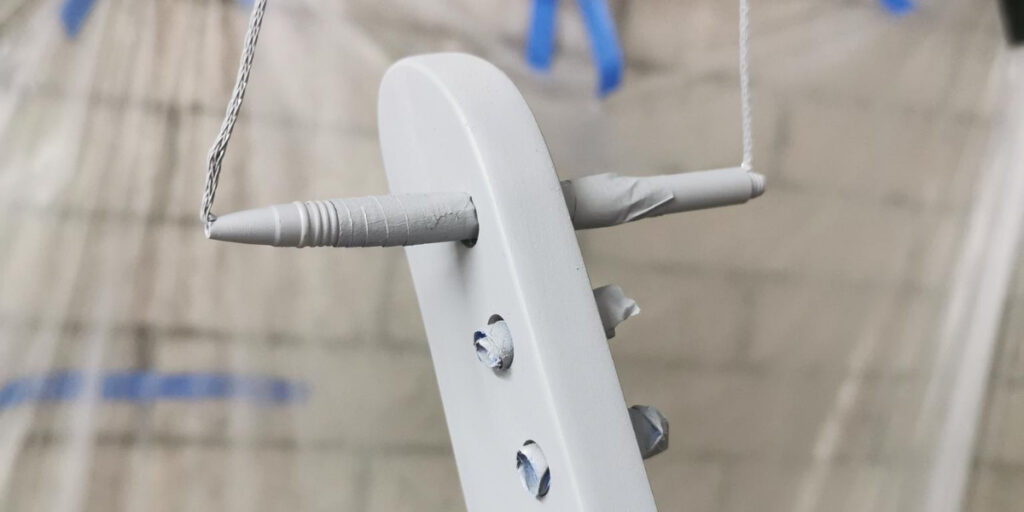
Initially, I had simply hung the guitar using wire. This ended up with wire too close to the headstock and would have made painting difficult. So, I hollowed out a pen, and boom! This would be my greatest moment in this whole guitar kit build process.
After the paint had dried, it was time for another moment of truth. It was time to remove the masking tape. I have to say, I was pleasantly surprised by this stage. This thing was actually starting to look like a guitar!
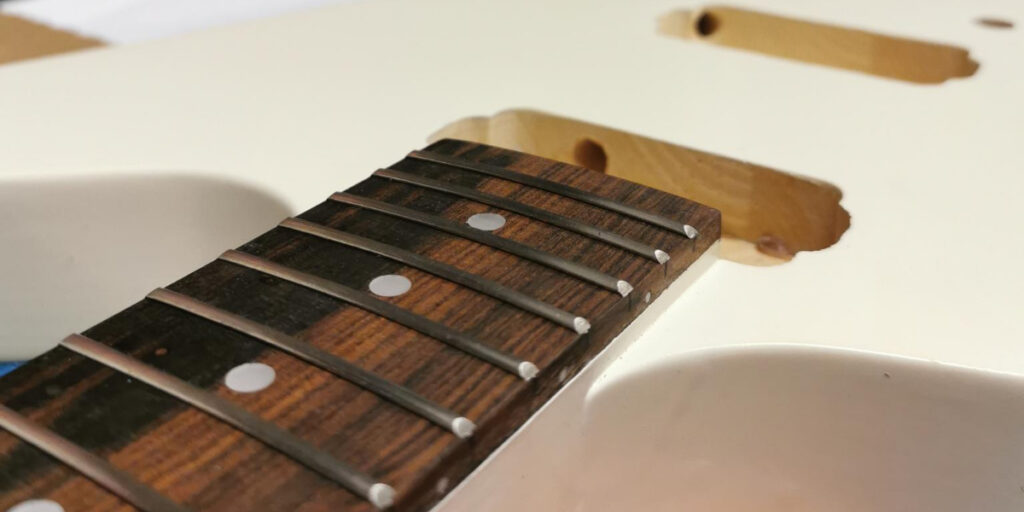
I needed to do some fine sanding and basic tidying up, but the masking tape had done its job. I applied some fretboard oil at this stage as I wanted to see how this guitar was going to really look. The fretboard came up beautifully and the oil darkened the wood while softening it at the same time.
I couldn’t fault the kit components as I was putting this together.
It was at this point that I used the finer grades of sandpaper that I mentioned earlier. There were many stages of sanding, polishing, sanding, buffing, sanding, and more sanding. I did so much sanding and polishing that I forget the order of things that I did here. The paint ended up looking halfway decent though.
The next stage for me was applying the shielding to the cavities that would contain electronics. This process was easier than I’d thought and ended up looking nice.
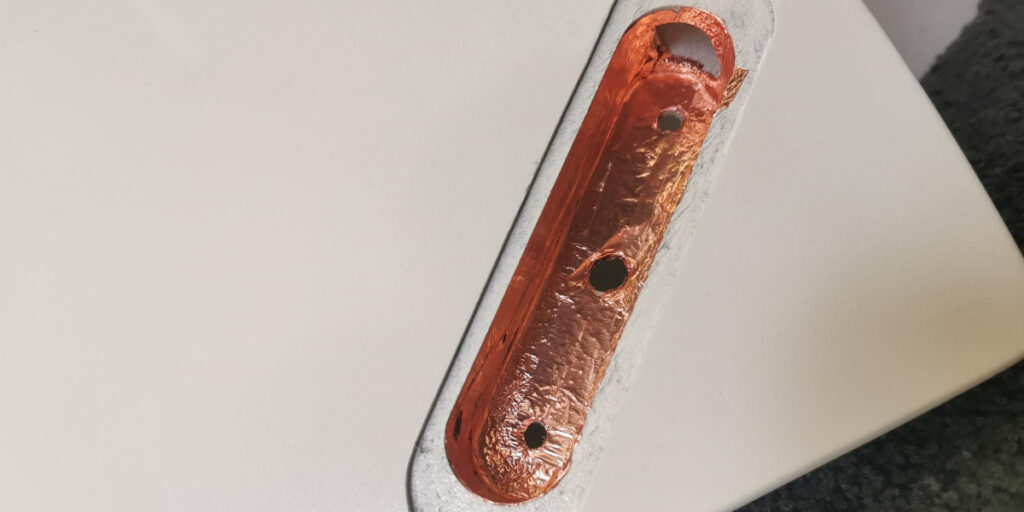
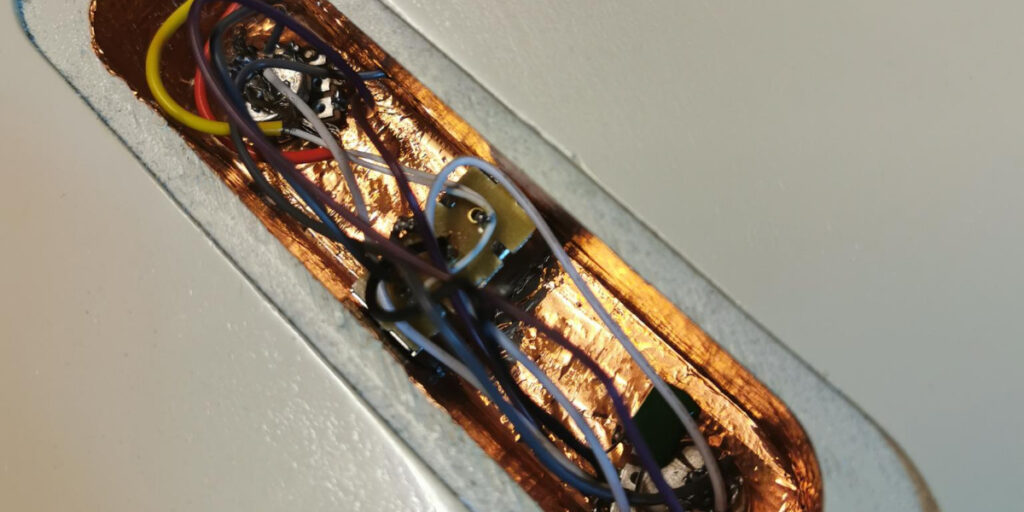
The same shielding was applied to the pickup cavities on the front of the guitar body. With the shielding in place, this meant it was time to approach the most terrifying process of the guitar kit build for me. Soldering.
I am not a person who has steady hands. I also do not have very good eyesight. This was always going to be a disaster.
Having said that, I was determined to give this a go. And, for the most part, I did OK. Some of my soldering is far from perfect, but I did manage to get the guitar playing through an amplifier at the end of the day. It’s not perfect, but it worked.
I suspect that I’ll one day attempt to replace the pickups with a solderless set for an improved sound.
The next step was one that nearly broke me. This is because I made my biggest mistake and at the same time, discovered that my paint hadn’t cured as perfectly as I’d hoped it had. I’ll just say this … although the hardware that goes into the guitar body for the bridge and the tailpiece both have the same hole size and the same into-the-body design, they are not the same.
Yes, I insert the tailpiece poles into the bridge position. Idiot.
After some very choice words and careful, slow removal, I unplugged the tailpiece poles and correctly installed the bridge and tailpiece into their proper positions. Even though I had been careful, I did end up damaging the guitar’s fresh paintwork. It seems I hadn’t let the paint cure for as long as I should have. This was another lesson learned.
Initially, I was devastated. After a while, I looked at it a different way. Or, a different series of ways perhaps. This is my first attempt at building a guitar. I, therefore, needed to cut myself some slack. Also, some people pay big bucks for a reliced guitar. This guitar is somewhat reliced. But it is reliced through actual wear and tear.
So, my guitar has some additional features. That’s how I’m now choosing to look at it.
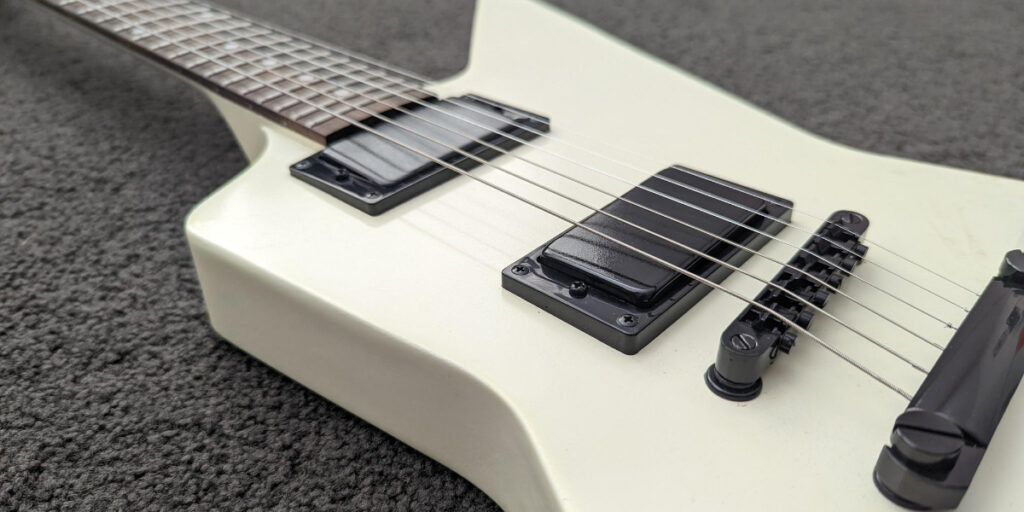
After that giant hiccup, I installed all other hardware. The locking tuners in particular look amazing.
One sad discovery I made was that with all hardware in place, the guitar’s action is higher than I’d like. I spent a few days making slow and careful truss rod adjustments, but the strings just never sat where I wanted them to without fret buzz. The guitar is very playable, it’s just not … perfect.
Having said that, at this point, I was still incredibly happy. I just needed to apply some finishing touches. for example, I needed a headstock logo.
As I mentioned at the beginning of this post, I was referencing a guitar that meant a lot to me. It was an Explorer, but not a Gibson Explorer. It was an ESP, but not labeled as an Explorer. So, I combined the two elements and made my EXP.
EXPlorer.
I’d seen videos on creating your own headstock logo, but at this stage, I was afraid of doing anything that may further tarnish my inferior paint job. So, I just ordered a transfer sticker from the good folks at Sticker Mule and applied that to the headstock.
To finish the look I was going for, I ordered some black pickup covers from eBay. I doubt they’ll help the sound, but they finish the look I was going for.
Would I do this again? Possibly. Only if I was staining the guitar and not painting it. Even then, I’d only do this if the guitar kit was solderless. The process itself was an absolute blast. I thoroughly enjoyed the guitar kit build. I just don’t have the skills for painting and soldering.
Lessons learned. Awesome looking guitar done.
thats pretty awesome. i felt like i rode that emotional rollercoaster with you as i read your article. very cool and very nice job. i plan do do the exact same build but with some emg pickups. hopefully mine turns out as nice as yours. i have quite a bit of experience with spray painting and soldering ive done quite a bit of and feel comfortable so my only fear is the actual product quality and any natual goof ups i make along the way because they sometimes just happen.
brad
Thanks Brad 🙂
By the sound of things, yours will end up being a much better finish than mine. I honestly feel like this would have turned out better if I’d had any real clue on soldering or painting. EMGs is something I hope to add one day … good choice!
Wow, awesome project!
My kit will arrive soon and I hope the result will be as awesome as yours!
Just out of curiosity, what’s the name of the font you used for your EXP Decal? I had the same idea of using an ESP-ish logo but I can’t find a similiar font.
Anyways I hope you’re having a lot of fun with your new guitar!
John
Hey John. Thanks very much for your kind words. If I could make one recommendation to you, it would be “make sure you allow enough drying time for the painting and drying process”. That’s the one thing I rushed and would do differently if I were to try this again.
The font that I used is called Future Black and I believe I found it on the Fontsgeek website. Best of luck with your project.