
Changing guitar strings doesn’t need to be overly complicated, even if your guitar uses a Floyd Rose tremolo. All you need are the right tools and a plan of attack. Maybe attack is the wrong word … now it sounds complicated again.
Stay with me. I’ll show you the tools I use when changing guitar strings on my electric guitars in the order I use them.
Recently, I’ve started blogging again, and the theme that has generated my refound passion for all things guitar and blogging is affordability. I realised that affordability has greatly contributed to my guitar fascination for as long as I can remember.
Most of my guitars are of the affordable variety. For example, I don’t own a Gibson guitar. Don’t get me wrong, I’d love a Gibson. But, when I think about buying a guitar for $2000, my mind says “Why buy one, when you could buy two?!”
When it comes to restringing guitars, it’s no different for me. I like to create a process that ensures I’ll get the most bang for my buck and the most efficient use of my valuable time. That’s why I use the following tools when I restring most of my guitars.
Tools for changing guitar strings … the list!
- Guitar work mat
- Guitar neck cradle
- Floating tremolo bridge shim
- Guitar string winder
- Fingerboard care kit
- Guitar strings
Guitar work mat
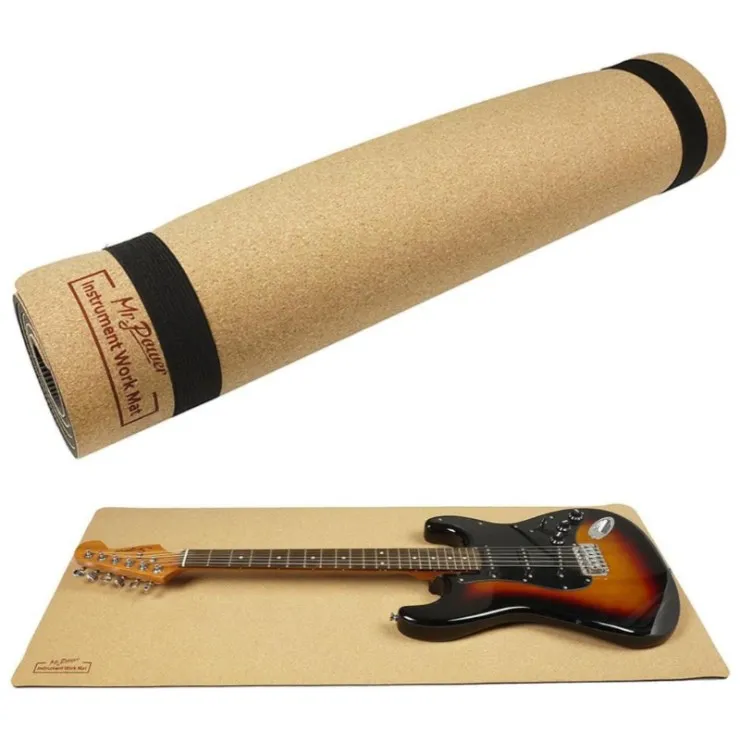
Unless you’re young or a Yoga instructor, you probably need to do your guitar restringing on a table or benchtop. Restringing a guitar on the floor just isn’t good for your back. We can’t all afford a dedicated guitar workstation though, so if you’re going to put your guitar on a table or benchtop in your house, you’re going to want to put something between your guitar and your table/bench surface.
Doing so protects your work surface and your guitar. It also makes you look a lot more professional to anyone watching you work.
“Ooh! He has a guitar work mat. He knows what he is doing.”
A good guitar work mat has a non-slip surface on the underside and a soft, absorbing surface on the top. I like guitar work mats like these cork/rubber options. They also work perfectly with the next item on my list.
Guitar neck cradle
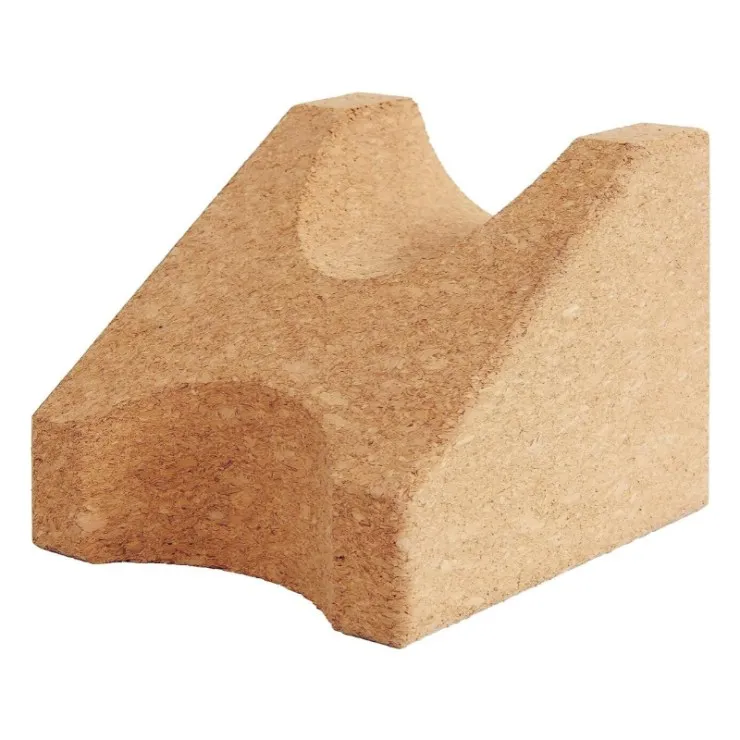
A good guitar neck cradle is like a good pillow for your own head. Sometimes you need a thinner pillow because you’re sleeping on your back or stomach. Sometimes you need a thicker pillow because you’re sleeping on your side. Guitar neck cradles like the one above can be used on their long side or their short side which allows you to adjust your neck rest height to best suit your guitar.
The most obvious advantage to requiring these options is the differences in guitar necks between an acoustic and an electric guitar. Because of the body thickness of most acoustic guitars, the neck is further from your work surface.
Often an affordable guitar neck cradle option is the cork offering. If you use the cork-topped guitar work mate, they also look great together.
Floating tremolo bridge shim
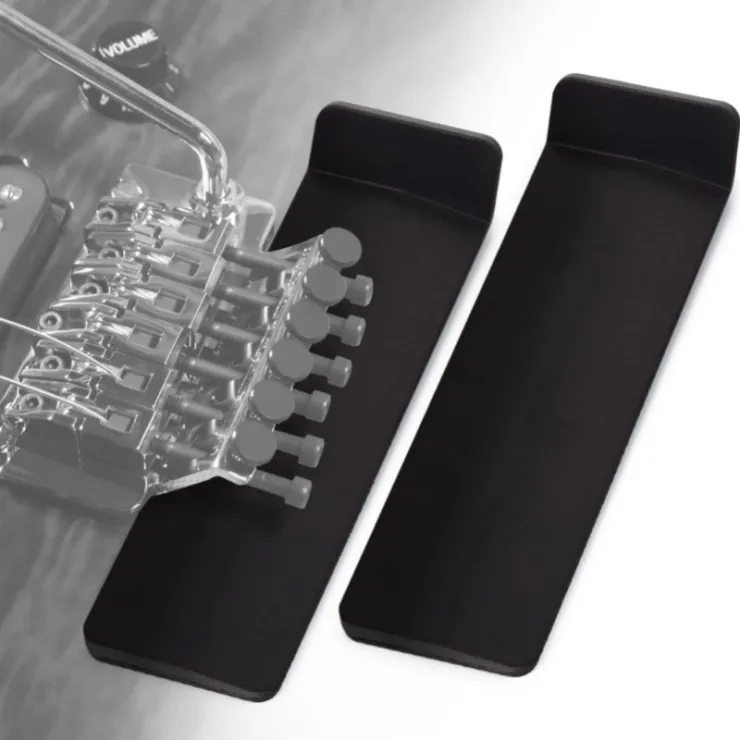
The floating tremolo bridge shim is not required for all guitars, but if you have an electric guitar with a Floyd Rose bridge, then I highly recommend this tool. Using this tool is a lot easier than the hacks I’ve seen and tried over the years—such as putting a battery under the bridge or changing one string at a time while relying on the other strings to retain tension.
The floating tremolo bridge shim is a lot easier.
All you need to do is apply tension to the tremolo arm, slide the floating tremolo bridge shim underneath until the bridge sits flush with the guitar surface (see the image above). From there, you restring your guitar with ease while the floating tremolo bridge holds the shim in place.
It’s an absolute time saver and will not damage your guitar surface in the process.
Guitar string winder
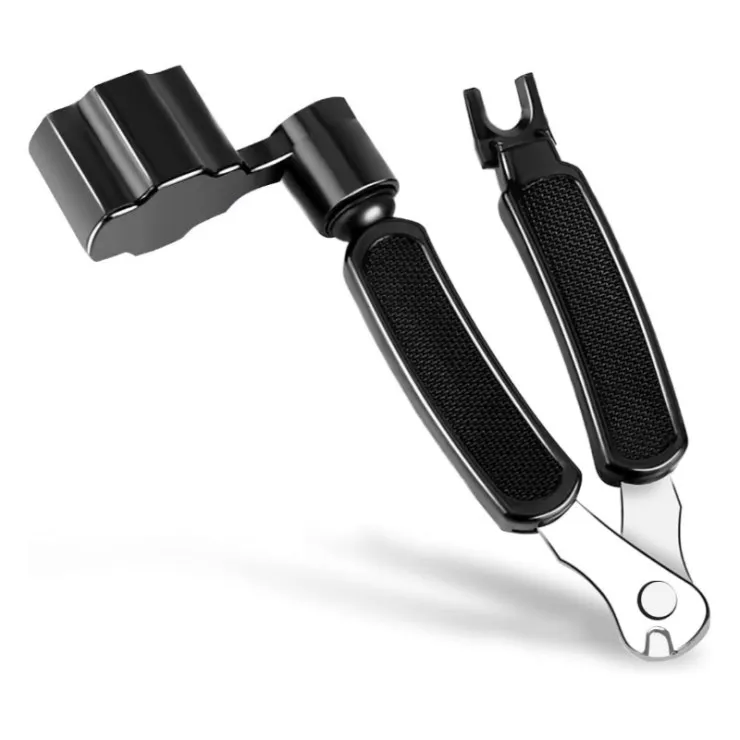
Sure, you can wind and unwind your strings by hand. But if you value your own time, why not use a tool that will make it easier and faster? This guitar string winder not only does that, but it also allows you to cut your strings to length when applying new strings or cut them off when removing them.
If you’re changing strings on a steel string acoustic guitar, then this guitar string winder also has a built-in slot to help pull out the bridge string pins. Yes, it’s a three-in-one tool.
Then there’s the fact that this tool comes in handy when removing old strings as well as when putting your new strings on. I’ve never looked back since using a guitar string winder.
Fingerboard care kit
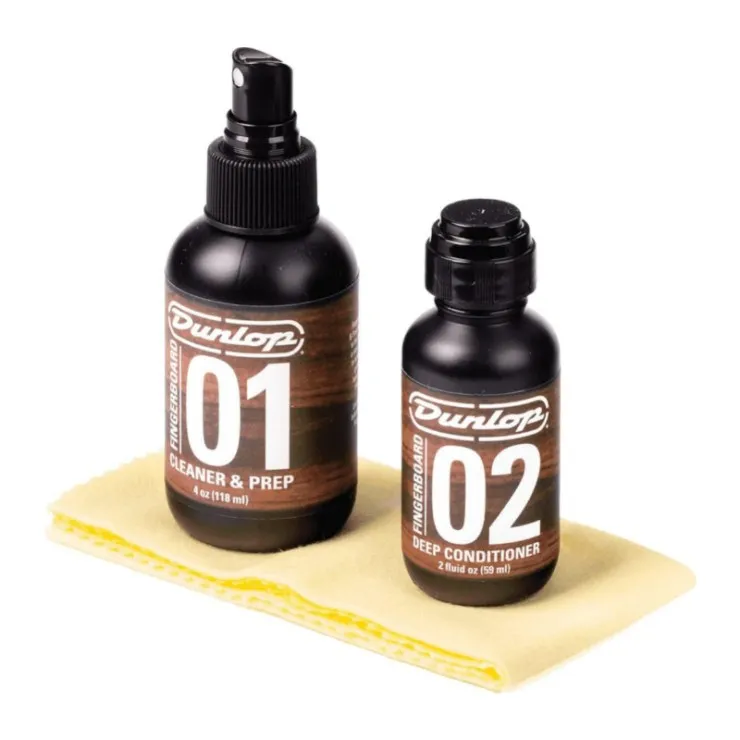
This one is also not a requirement, but in my opinion, if you’re not looking after your fretboard while you have the strings off, you’re doing yourself a disservice. Why would you put clean strings on a dirty fretboard?
I like to use a combination kit like the Dunlop kit so that I can clean the fretboard first and then condition it so that the fretboard stays in top shape for longer. Fretboards also look better when they’re shiny and clean.
One thing to check when getting a fingerboard care kit is that the kit matches the wood type of your fretboard. Maple fretboards need to be treated differently than rosewood fretboards. Make sure your solution matches your requirements.
Guitar strings
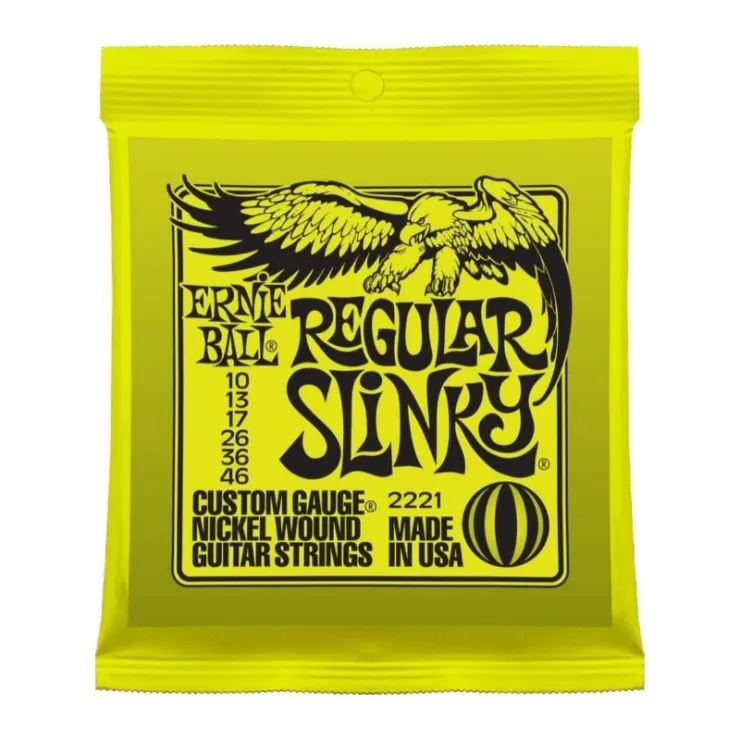
You can’t change guitar strings without new guitar strings. Having said that, the options when it comes to guitar strings are nearly endless. I generally alternate between Ernie Ball guitar strings and Elixir guitar strings. I also use different gauges on different guitars. For me, 9-42 feels nice on a Stratocaster-style guitar while 10-46 feels nice on a Les Paul-style guitar.
Changing strings and gauges can often involve a bit of setup work as the different tensions applied can alter the height of your strings on the fretboard while also affecting the feel of the guitar generally.
Once you’ve found your perfect match, stick with it and future string changes will become a breeze.
Summary
Most of these tools are either a single purchase or what I’d call an infrequent purchase. The guitar work mat, guitar neck cradle, floating tremolo bridge shim, and guitar string winder should all last you a very long time. The fingerboard care kit will last you as long as it lasts you depending on how many guitars you have and how often you are changing guitar strings.
The guitar strings you obviously replace every time you are changing guitar strings.
My process for changing guitar strings essentially follows the order that I’ve placed these tools today. That process is:
- Setup the guitar work mat
- Setup the guitar neck cradle
- Place your guitar on the cradle and mat
- (optional) place the floating tremolo bridge shim under the bridge
- Remove guitar strings using the guitar string winder
- Clean and condition the fretboard using the fingerboard care kit
- Put on your new guitar strings using the guitar string winder
Job done. It’s easy when you’re using the right tools and a clear process.